Wednesday, August 27, 2014

The Elisalex Dress

Well done, Elisalex. You took me by surprise.
This Elisalex Dress from By Hand London patterns is one of my most favorite things I have ever made. It wasn't love at first sight, though, but a gradual affection that grew while I was stitching. For starters, I've never worn a tulip skirt in my life. I tend to gravitate towards the extremes in silhouettes, very full or very fitted, and a tulip skirt stands somewhere in the middle. I was determined to try something new, though, so I forged on. 

I've also never sewn a garment with upholstery fabric before, but it was on the recommended list for this pattern to support the structure of the skirt. I worried over the thickness of the fabric, at first adding in way too much ease thinking I would need it with all its heft. I also thought I'd be sweltering in the summer heat. Not so on either count. This fabric is 87% cotton and 13% rayon and it breathes surprisingly well. It's just what these pleats needed, and it ironed beautifully. 
I used my sloper to fit the bodice, and something quite odd happened that has never happened to me before. I ended up being a UK 14 in the front, and  US 14 in the back! Apparently my front half is British. I guess the By Hand London ladies have very small backs. Just to keep things balanced, I tapered the skirt in the back to a UK 14 (a US 10) after the waist. 

Like most others have noted, I also took a considerable amount of length off the skirt, just shy of 7". I debated for quite some time if I wanted to slash it in the middle and adjust the length from there, or take it off from the bottom. I went with the latter because I didn't want an abrupt shift in the volume. I thought it would be more flattering to see it gently tapering down, with a slightly less snug fit at my knees, then go from full volume to full pencil. It worked marvelously.

Also, a note on those boxed pleats... I had the darndest time getting them to stay closed at the top, which I believe is the aim. That way when they line up with the princess seam and it looks like a continuous line that eventually breaks into a pleat past the waistline. I had basted each pleat as the instructions suggest, and then I added a basted zig zag stitch to close them at the top. That did the trick.
The bodice is lined with a lightweight khaki cotton, and I used a hand fell stitch to attach is to the fashion fabric. I stitched a bit too close to that invisible zipper, though, so I ended up having to go back and adjust it after I took these photos. It was catching when I zipped it up and you can see wee bit of puckering at the top from the teeth trying to take the lining with it. 
All in all, this was my kind of surprise. My Elisalex dress hasn't stayed on that dressform for long. I'm packing it up now for what promises to be a most agreeable trip. I'm headed to Arizona for a bit of work, followed by a weekend celebrating the upcoming nuptials of one of my dearest and oldest friends. The Elisalex will be perfect for a night on the town! 

Wednesday, August 20, 2014

Red & White Striped Moneta

Greetings from Austin! Well, it's always "Greetings from Austin" from me, but since I've shown you this pattern once before, I thought I would also show you this spectacular postcard mural.I have loved wearing my Colette Moneta so much, that I decided to sew a second version before the summer was up. This delightful red and white stripe fabric is a bamboo jersey knit. It's so wonderfully soft!
I made two fit changes from my first version of this pattern. I shortened the bodice by 1/2", and then I took 3/4" out of the neckline where I had a bit of gaping. My seamline is right at my natural waist now, which also means my belt doesn't look like it's riding up. Much better! 
I've read quite a few folks have had problems with the gathering method on this skirt. The instructions call for you to baste elastic to the skirt, which will gather it when you are finished. I didn't have any problems the first time around, or so I thought, so I proceeded per the instructions.

With stripes, though, you can really tell when things go wonky and it definitely did. I ended up ripping it all out and sewing it again because I wasn't able to get even gathers. It made the stripes look like they were hopping all around the top of my skirt. If I were ever to make another version, I think I'd do the regular old gathers with basting stitches.
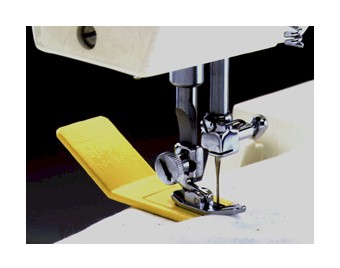
Now, I'm still trying to sort out the coverstitch on my serger, and I continued to struggle with top-stitching over the seams on this dress. The stitch just isn't even when I go over those bumps. I tried decreasing the foot pressure, and although it helped, it didn't solve the problem. I'm thinking of trying a hump jumper. There was a thread on Pattern Review that indicated it should fix the problem. 
Source
Have you ever tried a hump jumper, sometimes called jean-a-ma-jig, or the DIY version, a stack of post-its? 

Wednesday, August 13, 2014

A Gingham Summer Dress

I like a good detail on a dress. It's one of the things I enjoy most about vintage garments, and I relish the chance to add them in as a home sewer. This is an Emery Dress with a button detail at the shoulder. Hardly a show-stopping detail, but I quite enjoy that it makes the dress a little more special and my own.
I ordered this fabric from Hart's soon after sewing the playsuit for my nephew. This is very similar, with a slightly larger check. It's imported from Japan (so fancy) and has a bit of texture to it and a little stiffness that make it really great for a fuller skirt. 
I lined the bodice in a lightweight cotton, and for the first time, I used a fell stitch rather than a slip stitch when attaching the lining. It was a revelation! I like hand sewing, and quite enjoy doing it on hems, but the slip stitch I've always dreaded. This is such a nice alternative, and it's still hardly visible. Here's some more shots where you can see some of the details, including the buttons at the shoulder undone. There's a lapped zip in the back, too. 

How to Modify the Shoulders for Buttons

There are two quick changes you'll need to make to the pattern before sewing if you want to replicate this detail: removing the back shoulder dart and adding the extra length for the buttons. If I had it do over, I would have swapped where I put the buttons and buttonholes, too, and put the buttons on back. 

Removing the Back Dart

First, we'll need to get rid of the back dart so it doesn't get in the way of our buttons. We'll be redistributing the dart so the one at the waist picks up the extra. Start by drawing a line connecting each of the dart tips. 

Then cut out both the darts, and leave just a smidge of paper for a pivot point above the waist dart tip. 
Close up the top dart, and fill in paper for the bottom dart. I used a green colored pencil to draw in my new dart legs. You'll just need to true-up the lines at the shoulder and waist dart now. If you haven't done it on a dart before, just tape the dart together like you're going to sew it (so the legs are pressed towards the centered), cut the line at the waist, and presto! The dart legs will jut out a bit just like they should. 
The shoulder dart at the back is very nice if you have a broad back, as I do, so keep in mind that this change might require you to do an additional broad back adjustment. I did a 1/4" one after I removed the dart. 

I'll also add you could follow a similar process to move the bust dart on the front to the waist, which would have allowed me to pattern match at the side. I like the fit with a bust dart, so I kept it, but it will botch up your pattern matching. 


Adding the Length for Buttons

This step is extra easy. You just need to add enough space for the width of your buttonhole. According to my trusty Reader's Digest Guide to Sewing, this will be the width of your button plus the height of your button. Mine was 1/2" wide, and 1/4" tall, so I needed 3/4" (or 6/8"). This will put the closure smack dab at your shoulder line. 
There you have it! And I have a handsome new gingham summer dress! 

Wednesday, August 6, 2014

Cigarette Pants and a Monogramed Blouse

Before you are two of the projects I mentioned in my last post that drove me to detox sewing, collar calamities and pucker pants. They're done! Although now I will call them "monogramed blouse" and "coral cigarette pants," which are much nicer names. This is the face of a happy seamstress.
Let's start with the blouse. It's Simplicity 2195, a 1950s pattern, and boy oh boy did it give me trouble. I've actually sewn this twice before (one and two), and both times it was extremely uncooperative. I think there is something amiss with the neckline on this pattern (Maybe it's just my version? You never know with vintage patterns what wild life they led before you.) and the collar just will not go. I tried six times (SIX TIMES!) on this one before I gave up and drafted a new one. I think this fabric didn't help me either because it has an odd bit of stretch to it and did not like being eased. 
By the time I got done with the collar, the right sleeve drooped off the shoulder. Bah! Well, I went with it, and decided it was better to forge forward and finish then let it sit in a drawer wasting away forever. I monogramed my initials by hand to restore my affection for this blouse, and it worked! I quite like it now despite its flaws and our torrid history.
Now, the pants are my self-drafted cigarette pants I call Bedford. When I ordered this fabric, it was supposed to be red, so I was surprised to discover it was so pink, which isn't a color I wear very often. It mysteriously puckered when sewing, even when I couldn't see anything in the seam, and in general just wasn't great quality.

I decided to give it a go anyway, though, because it was a chance to test the fit of the pants in a fabric with spandex. They turned out fairly well, although I'm wondering if I need to take in the crotch a bit still, as I noticed a wee bit of excess fabric in the front on these photos. It might also be slim, my skinnier right leg, which tends to give me problems in pants.
In general, I'm not sure how I feel about these pants on me, but I think it's the color as I love my first version in black. I'm also thinking of a few construction changes for my next version in navy. Like adding an underlining, and maybe tapering the leg a little more for a slimmer fit closer to the ankle. What do you think?