

Inspiration
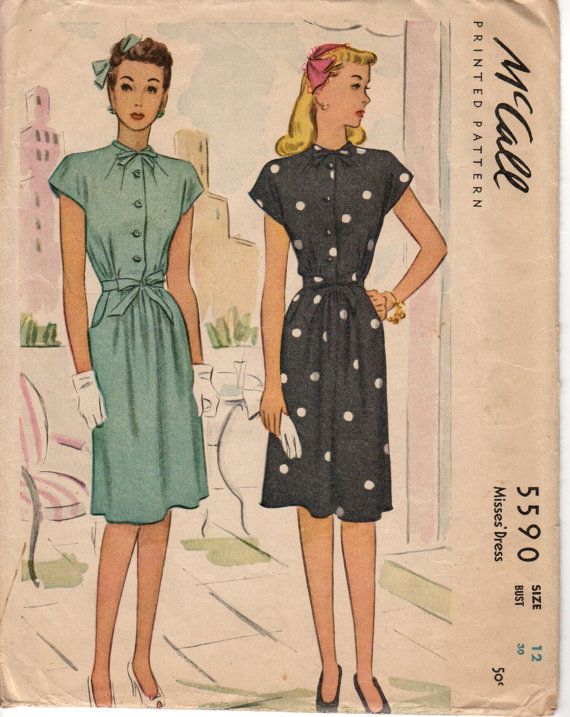
I scoured the web for tons of images and ideas, but the main inspiration for this dress comes down to just 2. The first is from a 1940s vintage pattern, McCalls 5590. It has 4 darts on the neckline.
 |
| Source |
 |
| Source |
 |
| Fig 65 |
I loved the idea of darts coming off the neckline, and experimenting a bit with 1940s styles. Since my first design was a shirtwaist dress, and a good everyday staple, I also wanted something a little fancier for my second design.
Manipulating the Darts
I decided that I wanted 6 darts coming off the neckline, and I wanted them all to be of equal length. I also wanted to keep the bodice cut on center front, so my darts would need to be on either side of CF. I began with my bodice sloper, and then moved and separated the dart from the waist up to the neckline. It looks like this from start to finish:


Here are the steps:
- Redraw new dart legs that go all the way to the bust apex.
- Draw 3 points on the neckline where you want the darts to end up.
- Draw lines connecting the tip of the dart to those 3 points.
- Cut out the dart at the waist, and cut along each of the 3 lines.
- Close up the dart at the waist. Evenly distribute the open space across the 3 new darts.
Perfecting the Darts
Now that I had the darts manipulated, I had to figure out the best way to sew them. Typically you move the darts about 1" away from the bust apex, so I started there. Because I had 3 darts, I had a bit of excess fabric that pooled at the end that was more than just adding fullness for my bust. Not very flattering! In the end, I made it work by:
- Moving the darts up 2 1/2" above the bust apex.
- Lessening the angle at the dart tip. I started tapering very close to the tip of the dart about 1/2" before it ended.
I hope you all had a smashing Christmas! Next week, we get started on the Shift Dress Sew Along with a bit of inspiration!

Ahhh this is brilliant. Thank you very much for sharing.
ReplyDeleteGladly! Thanks for asking!
DeleteI love the detailing and this green is a beautiful colour on you! ; )
ReplyDeleteThanks, Caroline!
DeleteThank you! I do like the darts from the neckline - and just in time for some vintage inspired sewing this year - much appreciated.
ReplyDeleteGladly! Sounds like you have a fun year of sewing ahead!
Delete