Wednesday, May 28, 2014

Bumblebee Shirtwaist Dress

I have been a busy bee (I had to get in just one bee pun, so best I do it at the start)! This shirtwaist pattern is from Gertie's New Book for Better Sewing, but the fabric is the real focal point of this dress. It is a lovely bumblee-printed rayon from Hart's Fabric. In addition to being a feast for the eyes, it was a real bear to sew, but we'll get into that in a bit.
I made this pattern for the first time early last year (it's actually the dress that started this blog!), and the best part about it, hands down, is the shirring at the back. It feels like you're wearing sweat pants, when really you're wearing a fancy frock. Plus, it gives the back of the dress a really great shape. 
I made a few small alterations to suit the fabric. First, I omitted the pockets. They're a great feature, but this fabric is so light and drapey that I didn't want to risk weighing it down with all the miscellany I inevitably stuff in my pockets. The second change I made was to do piping at the sleeves instead of the cuff in the original pattern. I tried the cuff, but it was getting lost with all those bees! The piping is much better, I think.
Now, let's talk about this fabric. This is one of the most drapey (drapiest?) fabrics I have ever sewn. In hindsight, it probably was not a great choice as it doesn't really have enough substance for the pleats at the waist or gathers at the sleeve cap, but I love it still.

I took a few precautions because of its drapiness, primarily putting a ribbon in the waist and at the shoulder seams to give it a little bit of extra stability. I didn't stay stitch my armholes, though, and that was a mistake. They stretched out considerably while sewing, causing a bit of a droopy shoulder that try as I might, I couldn't seem to resolve without making something else worse. I  barely had any gathers at the sleeve cap because I had miles of armhole to fill and barely enough sleeve to fill it. I also should have interfaced both sides of the collar to give it a little extra oomph. Here's a peeksie at the insides. 
This fabric was so loosey goosey it could barely sit still long enough to be turned into a dress. It just wouldn't cooperate! Now that a bit of time has passed for me to overcome our quarrels, I can tell it will be a favorite it my wardrobe, despite its imperfections. It's just so comfortable yet feminine. And the print is so wonderfully cheery and fun!

Wednesday, May 21, 2014

Vintage Baby Boy Sewing: Simplicity 1483

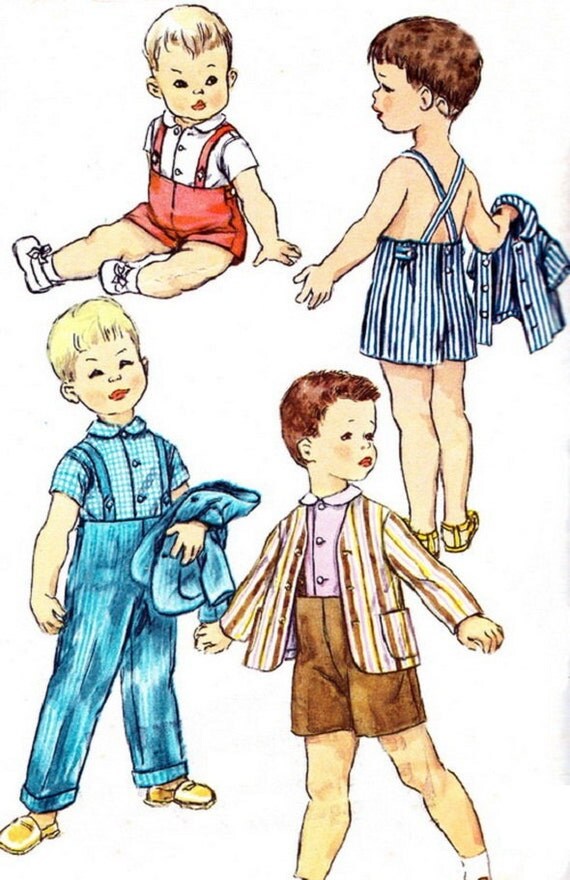
As I'm sure you can imagine, when I found out I was going to have a nephew, I immediately took to the internet to hunt down some vintage baby boy patterns. I knew I wanted to sew him a playsuit, and I managed to find an almost perfect match to a playsuit my grandma had made my uncle as a little boy. This is Simplicity 1483, a 1955 pattern.
Source

I started sewing clothes Lukas will need in a year or two because my brother and sister-in-law already have so much infant stuff. So sadly no pictures of the little one in these yet! 


I love the wooden buttons! I was also determined to match up the gingham. No nephew of mine will be seen with unmatched patterns. It turned out matching gingham was easier than any plaid I've matched before (it's so even!), so I'm feeling a little less daunted about some dresses I want to sew this summer in gingham.

I can't wait to see him in it! He's such a happy little baby, and I am adoring being an aunt and getting to sew for this little munchkin. 

In unrelated news, I recently did a couple of interviews that have published! So if you'd like to learn a bit more about me, what I do for a living, and how I learned to sew, take a gander. 

Many thanks to both Pattern Review and Cut Out + Keep for contacting me! 

Thursday, May 15, 2014

Me-Made May 2014 Part 1

It's Me-Made May! This is my first time participating, and I am having so much fun. It really is a great way to make new sewing friends, discover gaps in your handmade wardrobe, and see how sewers incorporate handmade into their daily life. 

If you're not familiar with the practice, the idea is to make a pledge to wear your handmade garments for as many days as you like for the month of May. I originally pledged four days a week, mostly because I wasn't sure what I'd be getting myself into, but it's been so wonderful I've been participating every day! 

So far this month, I spent lots of days at work, went to some parties for Pattern Review Weekend, took a business trip to Minneapolis, did a fancy brunch with my family for Mama's Day, and spent 2 days at home lazing about with Oxford and sewing. So without further ado, here is my daily handmade style for the first half of May. So many selfies! 
Day 4, Wiksten Tank
Day 6, Colette Sorbetto (unblogged)
Day 10, Wiksten Tank

You can watch the rest of the month unfold on Instagram.  Are you enjoying Me-Made May, whether you're playing along or just a spectator? 

Tuesday, May 13, 2014

Meet Beatrice, My New Bernina

I am now a Bernina Biddie. Or do you call yourselves Bernina Bitches? Babes? HELP ME, I'M NEW HERE. At any rate, I'd like to introduce you to my new Bernina 560, Beatrice.
The day that I purchased Beatrice was completely glorious. I just started a new job, and I decided a new sewing machine was just the ticket to celebrate. Flush with excitement and a bit of extra cash, I trotted over to Sew Much More, my local Bernina dealer, to test drive machines. I had done a bit of research in advance, and was thinking about the 350 PE, but had budgeted for something in the 5 series if it struck my fancy. The 5 series, you see, has an automatic thread cutter. I've used that on a different brand, and it is delightful.

I had never sewn on a Bernina before that very moment, and the instant I set down to test drive the 350 PE I knew there was no turning back. THAT STITCH. It's so beautiful and consistent! It felt so wonderful to sew on, like driving a luxury car. The saleswoman could see the crazed look in my eyes, and suggested I try one of the higher end models. Well, ok then.

The saleswoman, Cynthia (we had become quite close by this point), showed me all the features of the 560, including the sensational automatic thread cutter. It also has a series of screens that will show you recommended needle sizes, foot pressure, and tension based on your fabric type. Pretty neat, huh?

It comes with an extension table, which I would recommend to anyone if you can find it for your machine. I took the Sew Better, Sew Faster Craftsy class, which teaches you how to sew more precisely and without pins (it's called the Islander system if you want to look it up). One of the first things she suggests is to buy an extension table, and now I understand why. You have much more control over your fabric, which will allow you to get a more consistent seam allowance and overall cleaner stitch.

It also includes this fancy little accessory case for all your feet and stuff.
Cynthia then proceeds to show me the button sensor screen for the buttonhole stitch. You place your button up to the screen, and adjust the size of the square on it until your button fits into it nicely. This will automatically set your buttonhole length to the correct amount. I stared at her, mouth agape. "Uh uh. That's magic."

So, in the end, I went with the 560, and I just adore it. As I left the store, all the saleswomen and store patrons congratulated me as I wheeled it out to my car on a little trolley, waving goodbye and smiling stupidly.

And that's the story of how I became a Bernina Biddie. Let's just make that one stick; what do you think?

Wednesday, May 7, 2014

Retro Butterick 5748

Spring is in full swing, and temperatures are rising here in Texas. It was the perfect time to sew a sleeveless dress, and Retro Butterick 5748 fit the bill to a T. The fabric is a lovely cotton with a delicate floral print from Gertie's Fine Fabrics.
The best feature of this dress, if you ask me, is the bow detail. The pattern actually calls to place the bow at the front and back, but I opted to simplify it a bit and just place it at the back. I also quite like the matching V at the front and back neckline. I am wishing I had reinforced it a bit with interfacing or selvedge, though. I worry over time it might wear heavily at that area.
The pattern also calls for a full lining, and I've only put in a bodice lining. I love the way the full lining looks (see Sew Melody's gorgeous version as an example), but I felt like it wasn't practical with the weather we get down here in the south. I've been having this debate with myself quite a bit lately, actually. In my Home Sewing is Easy Dress, I opted for facings instead of linings for the same reason. I battled over that decision for days! A lining looks so lovely, but sometimes it's nice to only have 1 layer of fabric up against your skin when it's 110 degrees Farenheit out. 
This is also the second time I've used my sloper as the starting point for my muslin. I purchased a custom-made sloper for my pattern making class, but I'm finding it helps me so much with fitting, not just creating new designs. The method I am using to do that is very similar to the TNT "sandwich" method that Carolyn described in her guest post for the Shift Dress Sew Along I hosted earlier this year. It really speeds fitting along!