Friday, May 10, 2013

Great Gatsby Sewing: Fabric and Pattern

Happy Great Gatsby Premiere Day! In honor of the occasion, I thought I would share with you the fabric and pattern I am planning to use for Miss Crayola Creepy's Great Gatsby Sewing Challenge.


I had mixed feelings when I first saw this challenge. 1920s patterns are notoriously unflattering on curvy girls with their dropped waists and rectangular shape. I decided I'd spend a bit of time looking for something, and if I didn't find it, I'd call it a day. Here were my criteria: 

1. It needed to be from the 1920s to fit with the theme. 
2. It had to be flattering, so likely something with a seam at the waist or I could tie at the waist. 
3. I wanted to be able to wear it for more than just watching the movie. I love a good costume as much as the next gal, but I wanted to make something I could wear more than once. So likely not something fitting for a Gatsby soiree! 

Pattern 

Past Patterns 8340

I found the pattern through Past Patterns,  which is a fun little company I haven't bought from before. Here's the pattern description from the original, "Ladies' house dress, closing at left side of front, with sleeves in long or short length and a three-piece gathered skirt in slightly raised waistline; pocket and separate belt."

It meets my criteria perfectly, and I love the sailor-esque collar. Plus, I get to do fabric-covered buttons! 

Construction should be interesting for two reasons: 
1. I was warned before buying that the pattern had "minimal instructions", and they weren't lying! Nothing like a bit of fly-by-the-seat-of-your-pants sewing to make things exciting. 
2. The measurements are a bit crazy, and definitely don't match my proportions. 38" bust, 26-1/2" waist, and 42-1/2" hip. Definitely not the standard. So I'll be making some changes to the pattern for sure!  

Fabric 

I decided to go with a cotton fabric so it would be light and comfortable for spring/summer. I also wanted something a bit geometrical and a print that was a bit more subdued. 

Black fabric will be used as contrast.

I actually had a hard time getting the fabric for this. The pattern requires 5-1/2 yds of 36" fabric, so even with translating it to larger widths, it's quite a bit of fabric. I though I had found something perfect online at Hart's, but they called me to say they were short on fabric, so I had to start over. I'm pretty happy with it in the end! 

Are you going to see the movie this weekend? I was an English major, but I'm kind of apathetic about the book. It just doesn't tickle my fancy for some reason. I'm looking forward to seeing the film, but I'm definitely not one of the avid fans!

Sunday, May 5, 2013

The Starting Point for Getting a Good Fit

Fit is one of the most exciting and challenging things about sewing. A well-fitting garment can make you look like you’ve lost 15 pounds, and it can also really improve the polish of the garments you construct.

So how do you do that?

Introducing the Body Graph 

The best book I have found to help me understand how to fit garments is Fit for Real People. It’s got lots of great details around modifying patterns for particular fitting challenges. It all begins with helping you understand how your body is different than what pattern companies design for.

Buy this book. Look at all these happy women and their properly fitting clothes!

The big  pattern companies like McCalls, Simplicity, Butterick, etc. basically use the same sloper (a master pattern with no seam allowances) for their patterns. In order to get a good fit, you need to understand how your body compares with the “ideal” that they have designed for. You can do this with the body graph.

How to Make a Body Graph 

The book has great step-by-step instructions with illustrations. Here’s a general idea of what to do:
  1. Trace your body onto a large piece of butcher paper. 
  2. Mark a few key points:
    (a) Top and bottom of head
    (b) Shoulder
    (c) Waist
    (d) Hip (where your thighs join, also mark the widest part of your hip if this is different)
    (e) Knee
  3. Divide your body up based on these key points. In the “ideal” body, all these are equally distributed. 
  4. Start comparing your body to what the pattern company’s design for. There is a wonderful worksheet in the book that walks you through it step-by-step. You’ll be looking at things like the width of your body at certain points, the slope of your shoulders, etc.

What I Learned About My Body 

Now is the part where I reveal quite a bit about my figure in hopes of helping you understand this.

Here is my body graph:

Notice something right away? 

My Left Leg is ¼ of an Inch Bigger than my Right Leg! 

Readers, let me tell you, I never even knew this was the case. Even looking at my legs now, I can’t really tell the difference. But, boy does it matter when you’re fitting clothes. Take exhibit A here, a pair of pants I am currently working on (Butterick 5895).

See that? Excess fabric because Slim is so thin. 

All I had to do was take in the leg a little bit on my right side. Ta da! Now I’ll have a great fitting pair of pants.

I Don’t Have Broad Shoulders, I Have Square Shoulders

I always thought I had very broad shoulders. So much so, that I would stay away from puffy or fluttery sleeves lest it draw attention to them. Turns out I have been operating under a misapprehension!

The shoulder slope the pattern companies are designing for is 1 5/8 inches. I have a ¼ inch slope to my shoulders! This makes them square. The shoulder width is 4 ¾ inches, mine is 4 ¼ inches. So mine are not broad. So now I have no fear about wearing things like the lovely Colette Taffy and looking like a linebacker.

I am Short-Waisted

According to pattern companies, your waist should be mid-way between your underarm and where your thighs join. I have 18 1/4 inches between my underarm and where my thigh join. So here’s an image that will show you the differences between me and the ideal:


If you’re more than 1” above or below the “ideal” then your short or long-waisted for your height. I am short-waisted.  I like wearing high-waisted skirts and pants because it allows me to accentuate the thinnest part of my torso. I also find it to be more comfortable because it matches the shape of my body!

How You Use This 

Going into any project, I know up front that I will have changes to the pattern based on my body graph. Things like:

  1. A full bust adjustment. The major pattern companies design for a B-cup in the “ideal” form.
  2. Shortening the waist.
  3. Adjusting the shoulders to account for my squareness. 
  4. Taking in the right leg a bit on pants. 
  5. Etc.
See? You’ll have to make adjustments based on each of these items in order to get the garment to fit you properly. Fit for Real People also includes great instructions for how to make each of these changes.

A Caveat for Indie Pattern Companies

Indie pattern companies don’t work off the same slopers as the big ones, so you’ll likely have to make different adjustments. At least you understand your body enough to know what that might be!

For example, Colette Patterns designs for a C-cup instead of a B. I’ve found Gertie’s patterns from her book always require narrow shoulder adjustments for me, and I don’t usually have to make those changes for the larger pattern companies.

An Ode to Chubs 

In closing, I will leave you with a limerick in ode to Chubs, my left leg.

Oh Chubs, you throw things off kilter
It’s a wonder I don’t just change to a quilter!
Because of my body graph
I can just laugh
Instead of being bewildered!

Wednesday, May 1, 2013

New Look 6587 with a Ric Rac Flourish

Happy May Day! I don't know what the weather is like where you are, but in Texas it's already getting pretty hot. That means it's time to start the sundress sewing!

Rosie Wednesday New Look 6587

Rosie Wednesday New Look 6587

It's a little bit tough to tell in some of these pictures, but I've included ric rac all around the neckline of the dress, as well as at the pockets.

Rosie Wednesday New Look 6587

Isn't it fun? Fabric-covered buttons also make me giddy. Really and truly. I'm sure you're starting to notice that I use them any chance I get. 

The fabric is actually a Ralph Lauren Cotton. It's slightly heavier weight though and I think intended for home dec. I really liked using it though because it gave a little bit of stiffness to the flare of the skirt. 

Rosie Wednesday New Look 6587


I really enjoy this pattern. It's has princess seams, which I like the fit of much better than plain 'ole darts. It also has a nice flare at the skirt. It's just gathered with basting stitches all the way around and then attached to the bodice. All in all, it feels like a 1950s house dress to me. 

The weather was very muggy on the day we took these pictures, so I had my hair in curlers tucked away for the better part of the morning to make sure it didn't fall! 

Rosie Wednesday New Look 6587

Also, let's pause for a moment to talk about how much I needed a parasol. I mean, right? 


Toodle loo! 

Tuesday, April 23, 2013

Colette Taffy

Another gem from the Colette Sewing Handbook! This is the Taffy.


Rosie Wednesday Colette Taffy

Rosie Wednesday Colette Taffy

Sewing Air

I used Silk Georgette for this top from The Common Thread, a local fabric shop here in Austin. I've never sewn a silk before, so this was a new experience for me. 

In the end, I found cutting to be the most challenging. I used masking tape to tape my fabric to my hardwood floor so that it wouldn't slip around so much while cutting. I thought it worked fairly well, until I started sewing and discovered my front top was all wobbly at the bottom ends. So perhaps not as precise as I had hoped...I saw on Colette Snippets today that they recommended a fabric spray stabilizer, so I will have to try that next time. 

Sewing turned out to be just fine, despite the airy quality of the fabric. I loved doing the French seams. They just look so beautiful. 

Bias Woes

Like a complete ninny, I forgot to staystitch my neckline as soon as I cut. The end result was that my neckline stretched quite a bit when I applied the bias tape. So my two options were...

 I could have worn it like this, with a lovely droop in the middle. 

Or like so, as a kind of off the shoulder number.

As I'm sure you can tell by my face, I wasn't too keen on either of those options. I also didn't want to put a dart because the fabric is so sheer. 

I got a stroke of genius, though, and remembered I had elastic thread in a bobbin from the shirring I did on my shirtwaist dress. So I ripped out the stitches on the bias tape, sewed a line with elastic thread in the bobbin, and it fixed the problem! The little bit of gathering just looks like it's part of the design of the top, so it worked out splendidly.


The Flutter Sleeves

I've seen quite a few posts where people have said that the largeness of the flutter sleeves bothered them on this top. I actually quite like them! What do you think? 

Rosie Wednesday Colette Taffy

Rosie Wednesday Colette Taffy

Until next time, remember to staystitch those curves!

Sunday, April 7, 2013

Mad Men Challenge: Joan Blue Shirtwaist Dress

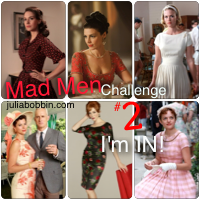
Last week on a total whim I decided that I would participate in Julia Bobbin's Mad Men Challenge. I got the pattern on Monday and was determined to finish it in time for the Season 6 premiere. So here is my Joan masterpiece!

Joan's Dress

My version


I found the pattern on Etsy, Butterick 8576. It uses gathers at the bust area instead of a dart and pleats on the skirt. I actually really like the fit of it. It's not quite as form fitting as Joan's, but it's super comfortable and I think flattering. 

I got the fabric, a gabardine, from High Fashion Fabrics when I was in Houston last weekend. I'd like to try the pattern again it in a floral or a stripe maybe, in a lighter fabric than the gabardine. I really love the feel of this one, but it will be tough to wear in those hot Texas summers!


The back has two vents at the back, which gives it a nice little kick.

 
 "Our Joanie plays the accordion, you know..."

My brother was kind enough to let me use his airstream trailer for the pictures, as well as his accordion that he's had since we were kids. I've sewn a couple of things for the airstream, so maybe I'll give you a tour some time (if he'll let me!). 

I love Mad Men, and like most vintage enthusiasts, I'm mad about the fashion in it. I think I could get addicted to sewing a Mad Men-inspired wardrobe. I'm super excited for the premiere of Season 6 tonight, and even more jazzed that I have this swanky new Joan dress to go along with it! 


mmc27

Wednesday, April 3, 2013

A Bit of Hat Making

Last week, I took a millinery (hat making) class at Stitch Lab in downtown Austin. I had been on the wait list for ages, and when I arrived at the class and the instructor introduced herself, I understood why. Our instructor, Laura Del Villaggio is one of only a small handful of millinery instructors left in the United States! How lucky I am to have her in my hometown! And how sad that this is a dying art.


The class I took was for making Retro Fascinators, specifically a classic garrison cap. Laura provided us with the bases, out of a paribuntal straw (a close-weave, traditional straw), and walked us through some of the basics about how a base like that would be formed.

The bulk of our class focused on decorating the bases. We talked through techniques for using feathers, ribbon, and veiling. Did you know you can do anything to a feather you can do to human hair? Want your feathers curled? Just use a curling iron! It was fascinating. We also used a lot of steam to manipulate the materials we were working with.

My creation.

I ended up taking ostrich feathers and cutting them in half to get this fan effect. Then I stitched those down to the brim of the hat. The teal feathers are called goose biot, and I used steam and a pair of scissors to get them to a curl slightly. They're sewn together and then stitched down to the hat. That makes it seem like it all just came to me fully formed, but I ended up spending about three hours just playing with materials and pinning different ideas down. 

Ta da! Perched atop my recently cut flapper bob. With some friends from Oddfellow Orphanage behind me.

I had a wonderful time, and hope to attend classes at Stitch Lab again soon. Laura's next class will be on creating felt cloches. Maybe I'll be able to make it on the list!